This old chippy wood has enjoyed a real comeback. Why is it that a natural aged patina is considered beautiful in decor but not on our face? Just a thought.
Anyway....
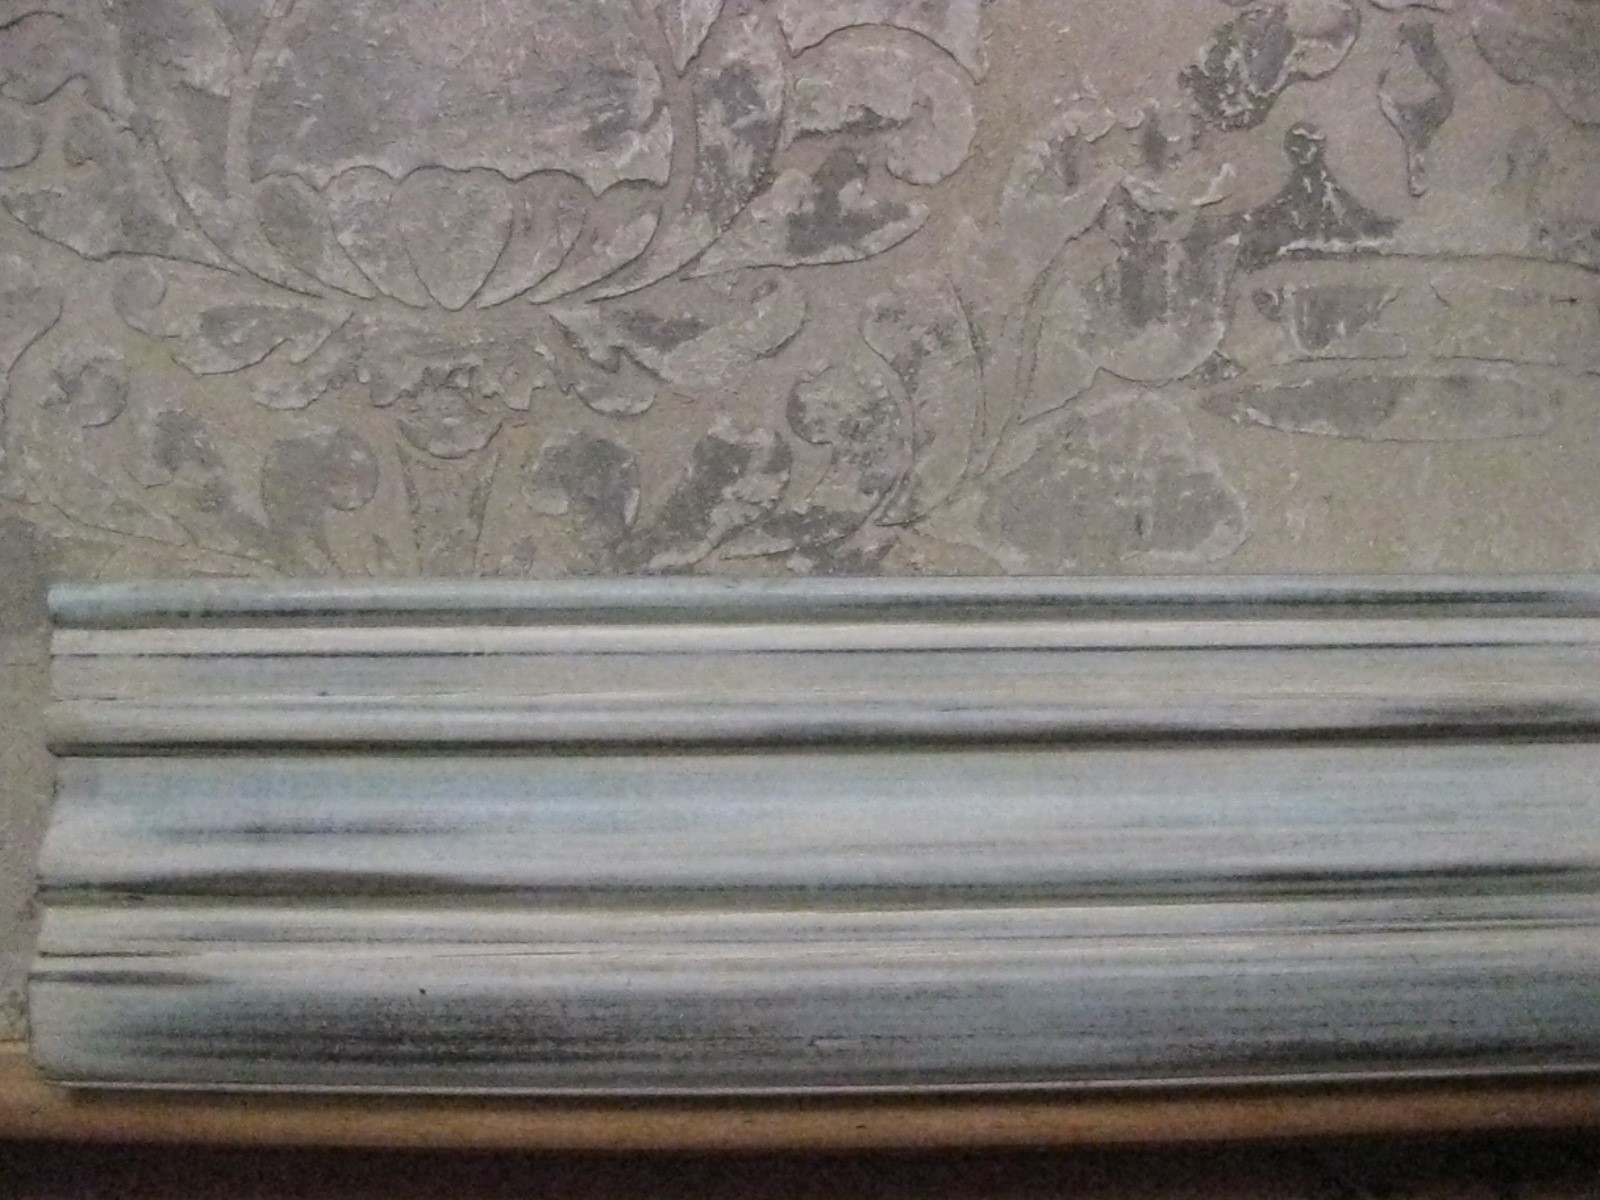
There are several ways to fake the look of barnwood. Here are two ways that use the same products. One is for a wall that has no wood. The second is for flat wood that has no character. As you can see in the above picture, one thing that makes barnwood interesting is the heavy grain. Part of our goal is to create that same rough hewn appearance.

I am using Faux Effects Setcoat Clear, Cracklemate, and Sandstone. The Setcoat Clear is our prep base. You want your Sandstone to bond to the sub-surface. Be careful about using latex paint especially paint & primer in one or scrubbable paint. These are good paint and can even be high dollar. But many are loaded with vinyl which allows for coverage and cleaning. Have you ever tried to get stuff to stick to vinyl? The point is you're not. Many faux finishing products will not cure well to these paints. If you are going to use latex paint as any base for faux finish do sample. Then take sticky tape and burnish it over the finish. PULL! It shouldn't come off if it's bonded.
Roll 1-2 coats of Setcoat Clear on your surface and let it dry over night. Next we are making our wood texture. I mixed 1 quart of Cracklemate with 1 gallon of Sandstone. Cracklemate is an additive that allows products to crackle over crackle size. In this case, I'm using it as a conditioner that will allow my Sandstone to thicken and pull in areas.
Add 1-2 cups of water and mix. The Sandstone will form a nice fluffy paste. For a cabinet/wood finish you will brush the mixture over the surface following the grain. An old chip brush will work.
For smaller pieces I like to use a cut-up wallpaper brush to create my grain. A stiff bristle one works best. Just pull it through-again following the grain.
If you would like to create more depth, use your chip brush to blot in heavier areas of the Sandstone.
If your surface is a flat wall, first you will need to mark off your planks using a ruler and a level. Tape off alternating planks. Decide if your planks run vertically or horizontally. Butter your trowel with the Sandstone mix.
Hold the trowel at a slight angle to the surface and apply the Sandstone in a medium thick layer.
I like to use several tools to create grain.
You may use the wallpaper brush again. Another tool is our Bark Specialty Roller. Attach the roller to a 4" roller cage-it won't fill the entire roller which is fine because it makes it lighter and easier to roll. Just follow your plank and roll using medium pressure. The Cracklemate will help your pattern roll more cleanly.
For some planks I want to create a heart grain. This is done using a rocker grainer.
You can see the small semi-circle facing my hand. I set the grainer on the edge with the small semi-circle touching the surface. As you pull the rocker toward you gently "rock" the tool back and forth.
You will need to clean your rocker as you go. Use a stiff chip brush (we all have those!) and knock the product back into your bucket.
Let the Sandstone set for 20min and then gently compress with a trowel held flatly. Don't over flatten
Pull the tape and repeat on the alternate planks.

I am using Pre-Tinted Old World Finishing Paint for my color layer. The colors I've selected are Earth (a warm green based neutral brown), Dove (a stone light grey) and Coconut (a clean white).
These colors may be used straight from the can. You may mix them together or add colorants to get custom shades. I started with the darkest color which is the Earth. Roll it on for the wall finish.
I brush it on the wood. This shade is made from mixing 3 parts Dove with 1 part Earth.
The Old World Paint will dry about 25% lighter then the wet batch. It will darken after you sand and seal. Each color layer needs to dry at least 2 hours. Then you may start stacking colors.
I re-taped some of my planks to apply my other colors. This is Coconut over the Earth color.
This is Dove over the Earth on the wood.
Once you have your colors stacked, use a rough sanding block to reveal underneath colors. OWFP is dusty so wear a dust mask. Wipe off the surface with a damp cloth-this will show you the true color variations and how much you've sanded off.
After sanding you need to seal the surface. Mineral based paints are absorbent and will soak up tinted glaze colors. I used Aquaguard Satin. I mixed 3 parts Aquacreme and 1 part American Walnut Stain & Seal. I also mixed 3 parts Aquacreme and 1 part Van Dyke Stain and Seal. You may use Faux Crème Colors and Faux Crème Clear if you prefer.
Use a damp cloth to move the colorant and to soften the finish. You may spritz with water to remove more glaze and lighten the finish. You want to avoid too much variation to keep the finish from looking like stripes.
For cabinet finishes I roll another coat of Aquaguard Satin so the surface may be cleaned. You may do the same to the walls.
This is a great finish to add character to boring pieces and to cover damaged wood or walls. Perfect for the popular reclaimed wood look!