Friday, December 23, 2011

The House that Holiday Hams Built.


Our friend Sue has been working on a wonderful house for the past several months and from the scattered pictures posted on Facebook and her stories about the delightful home owner, I was dying to see this project. Last week, with time before Christmas and family arrivals, my faux finisher friend Julie and I drove up to visit the job site.

To our surprise the friendly homeowner met us at the door to give me and Julie a personal tour of her dream home.  The homeowners are self-made entrepreneurs that built their business on pork and not the government spending kind!  Many fun details in the house pay a homage to pigs.


When you walk in the entry, this stunning dome caps off the main staircase.  Sue applied a Modello in Lusterstone over a foil background. She used various glazes to age the finish. This dome is massive and required extensive scaffolding just to reach it.  Julie and Ashley helped to apply the pattern so it was nice that Julie could see the fantastic results. Sue even added a little bling to the center medallion with faint glitter.


The house has a huge kitchen with a large eat at island that our other friend Brenda was carefully detailing in Gold Faux Metal. The homeowner wanted us to check out her new hearthroom chairs and put our feet up-no problem!


We could relax and take in the view of Kansas City-too bad it was overcast and threatening to snow so we couldn't really see the city. We will just have to come back in the summer-when the patio fireplace and entertaining area is completed.


Sue and team have carefully highlighted all the extensive cream molding in the house with Gold Faux Metal.


The palette in the home is warm earth tones with accents of aged gold and bronze.  This is another Modello that Sue applied and finished in the Master Bedroom Ceiling.


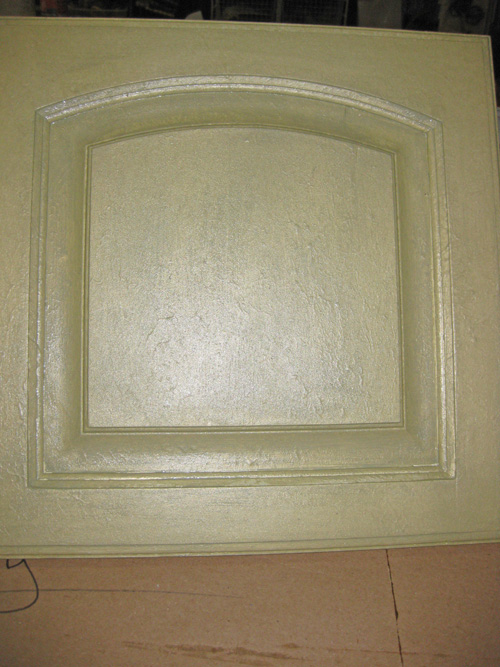
The Homeowner requested a simple textural finish for the columns that divide the bedroom and sitting room space. Sue applied thinned O'Villa Sabina and left it in the natural un-glazed state.


Forget the closet that Mister Big built for Carrie-the Master Closet in this house is spectacular.  I should do this to a small bedroom in my house! The Master Closet opens to the Masterbath where Sue has finished the ceiling in antique gold and bronze metallic plasters.


There are several guest powder baths through-out the home. It is in these that the homeowner indulges her love of unusual sinks and sink stoppers.  Look closely at this little gem.


There is an adorable little frog sitting on the lily pad stopper! She showed us the carved frogs that will crawl across the wood vanity-love a person that has a sense of humor.  For the walls, Sue used a patterned foil and glitter for a subtle shimmer effect.


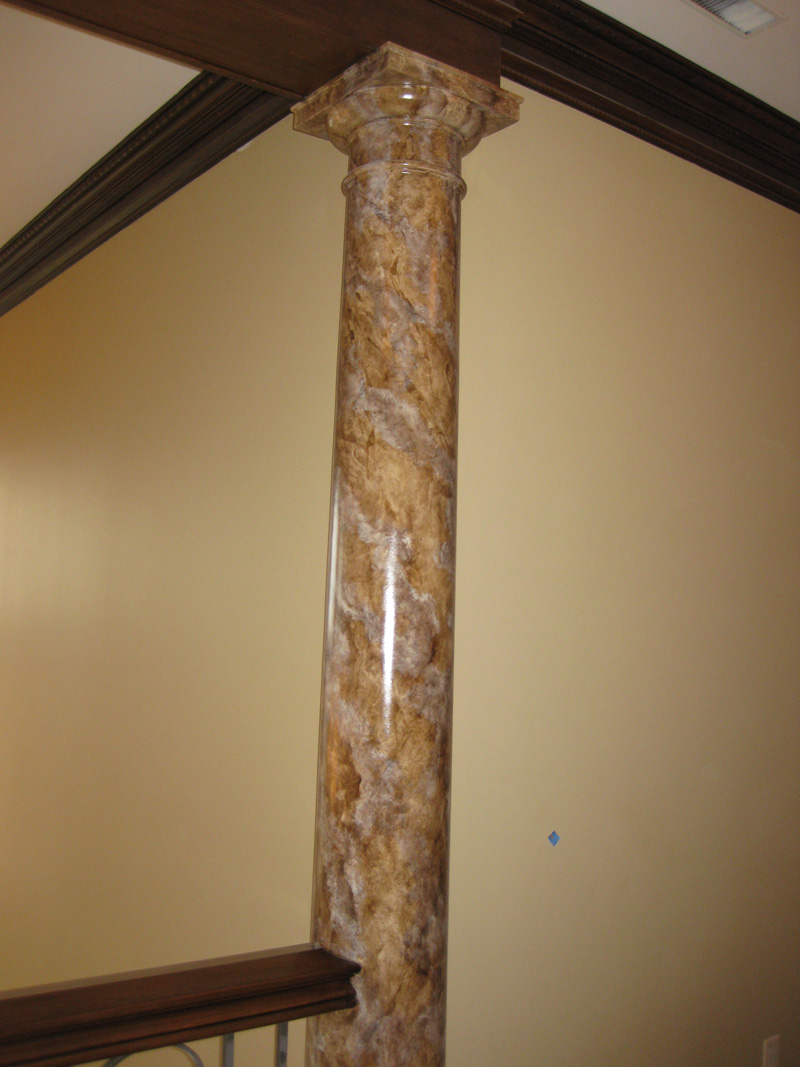
The second story landing has several columns that Sue has finished in marble.


In the office, Sue's talented artist friend Debbie painted this mural of the Brooklyn Bridge with a pre-2001 skyline.


The lower level bar will house the families 500 plus beer stein collection. The wood was custom carved and Sue highlighted the designs that celebrate the clients German heritage. Here is my favorite:


Sue applied rustic plaster finishes to the pantry and wine cellar walls.


And although, this pig sink is pretty cute, I think this guy still has my heart:


And by guy I mean Babe-I did not give up eating bacon for James Cromwell.

Thanks Sue for the Home Tour! Can't wait to see the projects you complete after the family moves in.

Tuesday, December 13, 2011

Some Christmas Greenery: A door sample for Michelle's Beautiful Bath


It's Easy Being Green

A good makeover gets you to stop and look at it. A great makeover motivates you to create a sample because you feel inspired. That was the case with this bathroom project from Hattisburg, Mississippi Decorative Artist Michelle Lopez.  Michelle is the owner of Sparkle Faux Designs.


The bathroom had a floral paper with jade tile. Looks like this is in the middle of the fun process of stripping wallpaper.

Using the tile as a starting point, Michelle applied Jade Plaster from Faux Effects. She created movement and depth with Pearl Palette Deco. Over the dried plaster, she applied Wundasize and then randomly popped in silver hologram foil.

The wonderful stencil called Lisbora Tile is a new design from Melanie Royals of Royal Design Studio.  Michelle pounced in more jade plaster over the design to create a slightly raised pattern. Pearl Palette Deco was gently striaed over the design.


As Michelle said, "It was a lot of work but worth it."

Michelle is a Facebook friend. When I saw the bath, I thought of two different cabinet finishes that, if combined, would be a nice compliment to this bathroom makeover.  She agreed to send me these pictures so I could create a sample and recipe to share with other on-line friends.

The walls are amazing and should remain the focus of the room. Right now the white vanity is crisp and clean in the room but pulls some of the attention from the walls. Since the vanity top and toilet are white, I didn't want a huge contrast-rather something in a similar green family that gently blends in.  I also wanted to incorporate some of the product that Michelle may have left over from the project.

I started with an oak door.

I cleaned the door with Paso and did a light sand.  Then I painted the oak with primer. Michelle's Vanity is either Thermafoil or a White enamel and should be primed to make it compatible with a water-based system.


My door needed cracks repaired so I troweled some Duraseal Sanding Sealer over those spots-that is the slight hazing you see on the primer.

To create some interest since the vanity doors have simple molding, I stippled directly on the primer with Duraseal Sanding Sealer. Just dip crumbled plastic in the Duraseal and pop on the surface.


I use this technique a lot. It dries hard, is easy to sand, may be tinted with anything, and adds a nice low texture. For a stronger texture, Master Finishing Medium may be used-it is just messier to sand. I hate to sand, so I just popped the Duraseal low to save me that step. This cabinet finish is also pretty without the texture. When the Duraseal dried, within 30 minutes, I could apply my basecoat.


Based on the tile color and the Jade Plaster, I used my Urban Fern Setcoat mix for the base. This is 3 parts Sea Spray Metal glow mixed with 1 part Sage Setcoat.


I brushed it on the surface and stippled it with a Neon Leon brush-this is the easiest way to apply a metallic basecoat if you don't spray it. One coat coverage is fine because I wanted the color light. If the door or surface is larger, use a small fluffy white or pink roller head to apply the metallic color and stipple out as you work across the surface.


To add a little bling and since she has the product, I used a sea sponge to spot in Wundasize to the center panel and recessed molding.

I let this set-up several hours and then applied Silver Hologram foil-even if Michelle has scraps that should be plenty for this project. I used my hand to rub the foil so it would only off-load in areas.


I like to use Palette Deco on my cabinetry-the Urban Red Door is a good example.  Michelle used Palette Deco Pearl so I did as well. I brushed in the center of the panel and used the Neon Leon again to pounce it down.


You should see the hologram foil underneath the Palette Deco Pearl. I brushed the Palette Deco Pearl over the outer molding and wiped it down with cheesecloth. For better flow, thin the Pearl with a glaze medium or an extender. The Pearl will dry down stronger then it first appears so apply it lightly-you want to see the green underneath.


I troweled with a Japan Blade a little more Palette Deco Pearl because I wanted a little more contrast between the center panel and the surround. If you do this step don't bury out the layers underneath.


The plaster layer dries fast.  I was ready to glaze with Stain & Seal within 40 minutes.

I brushed a mix of 2parts FX Thinner + 1 part American Walnut Stain + 1 part Rich Brown Stain. Gently soften the brush lines with cheesecloth. While the brown is wet I brushed in 2parts FX Thinner mixed with 2 parts Sea Spray Metal Glow (this was part of the base mix).


I used my cheesecloth to blend the colors. The trick is to keep the colors soft and not end up with monkey brown. Start in the center and work out to the edges. Again, don't loose the underneath colors as you work.


I used the stain mix for fly flicks and lightly thinned American Walnut to highlight the architecture.  When the detail work dried I sealed the door with Varnish Plus Satin.  I like my finish layer to dry over night before topcoating. Varnish Plus Satin may be too shiny for some so 2 coats of Aquaguard Satin is a great alternative and few people have application issues with it.


And here is the finished door.  It was super easy and should hold up well to water and humidity-she does live in Mississippi after all.

Thanks Michelle for sharing your makeover. You can visit Michelle at www.sparklefauxdesigns.com to see more of her work.