
It's Easy Being Green
A good makeover gets you to stop and look at it. A great makeover motivates you to create a sample because you feel inspired. That was the case with this bathroom project from Hattisburg, Mississippi Decorative Artist Michelle Lopez. Michelle is the owner of Sparkle Faux Designs.

The bathroom had a floral paper with jade tile. Looks like this is in the middle of the fun process of stripping wallpaper.
The wonderful stencil called Lisbora Tile is a new design from Melanie Royals of Royal Design Studio. Michelle pounced in more jade plaster over the design to create a slightly raised pattern. Pearl Palette Deco was gently striaed over the design.

As Michelle said, "It was a lot of work but worth it."
Michelle is a Facebook friend. When I saw the bath, I thought of two different cabinet finishes that, if combined, would be a nice compliment to this bathroom makeover. She agreed to send me these pictures so I could create a sample and recipe to share with other on-line friends.
The walls are amazing and should remain the focus of the room. Right now the white vanity is crisp and clean in the room but pulls some of the attention from the walls. Since the vanity top and toilet are white, I didn't want a huge contrast-rather something in a similar green family that gently blends in. I also wanted to incorporate some of the product that Michelle may have left over from the project.
I started with an oak door.


My door needed cracks repaired so I troweled some Duraseal Sanding Sealer over those spots-that is the slight hazing you see on the primer.
To create some interest since the vanity doors have simple molding, I stippled directly on the primer with Duraseal Sanding Sealer. Just dip crumbled plastic in the Duraseal and pop on the surface.

Based on the tile color and the Jade Plaster, I used my Urban Fern Setcoat mix for the base. This is 3 parts Sea Spray Metal glow mixed with 1 part Sage Setcoat.

To add a little bling and since she has the product, I used a sea sponge to spot in Wundasize to the center panel and recessed molding.

I let this set-up several hours and then applied Silver Hologram foil-even if Michelle has scraps that should be plenty for this project. I used my hand to rub the foil so it would only off-load in areas.


I like to use Palette Deco on my cabinetry-the Urban Red Door is a good example. Michelle used Palette Deco Pearl so I did as well. I brushed in the center of the panel and used the Neon Leon again to pounce it down.

You should see the hologram foil underneath the Palette Deco Pearl. I brushed the Palette Deco Pearl over the outer molding and wiped it down with cheesecloth. For better flow, thin the Pearl with a glaze medium or an extender. The Pearl will dry down stronger then it first appears so apply it lightly-you want to see the green underneath.

I troweled with a Japan Blade a little more Palette Deco Pearl because I wanted a little more contrast between the center panel and the surround. If you do this step don't bury out the layers underneath.


I used my cheesecloth to blend the colors. The trick is to keep the colors soft and not end up with monkey brown. Start in the center and work out to the edges. Again, don't loose the underneath colors as you work.

I used the stain mix for fly flicks and lightly thinned American Walnut to highlight the architecture. When the detail work dried I sealed the door with Varnish Plus Satin. I like my finish layer to dry over night before topcoating. Varnish Plus Satin may be too shiny for some so 2 coats of Aquaguard Satin is a great alternative and few people have application issues with it.

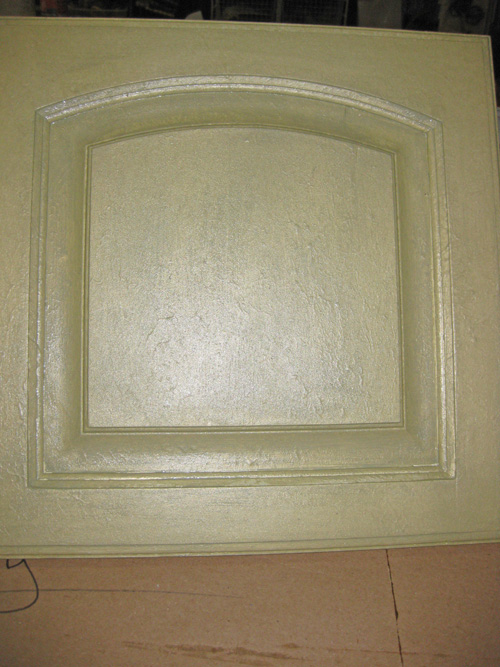
And here is the finished door. It was super easy and should hold up well to water and humidity-she does live in Mississippi after all.Thanks Michelle for sharing your makeover. You can visit Michelle at www.sparklefauxdesigns.com to see more of her work.
What a gorgeous finish. Hard to believe that sample cab door started out as ugly old oak. It would be great for Michelle to do the finish on the bathroom vanity as it really is a perfect compliment to the wall treatment. If she does, please post on your blog or FB! Thanks for sharing.
ReplyDeleteHave a great Holiday season, Lori
wow fantastic post about door, love this post & all these picture doors sample are awesome, thanks for sharing with us valuable post great job keep it up...
ReplyDelete