Tuesday, April 20, 2010

Awesome Airbrush Class: The Geisha

Krystiano completed an entire project during his visit to Surfaces.  It is amazing to watch each step and see the whole piece come together.  During the class and watching the Geisha come to life was very instructional.  It is important for your hand and mind to work with the "impression" of the object rather then a literal expression.  For example:  Using the airbrush to create individual strands of hair looks fake while building blocks of shading found in hair is more realistic.

The Geisha started with a high/low coat of troweled Plastertex.  When dry this was washed over with a neutral pale brown glaze.  We selected a copyright free image on-line that was done in simple black and white shades except for the vibrant mouth.
We scanned the image and printed it on a transparency sheet.  Using an overhead projector, a simple pencil contour drawing was done over the texture-think how coloring books look.  Krystiano used the airbrush and Black Faux Color to begin blocking in the first color.

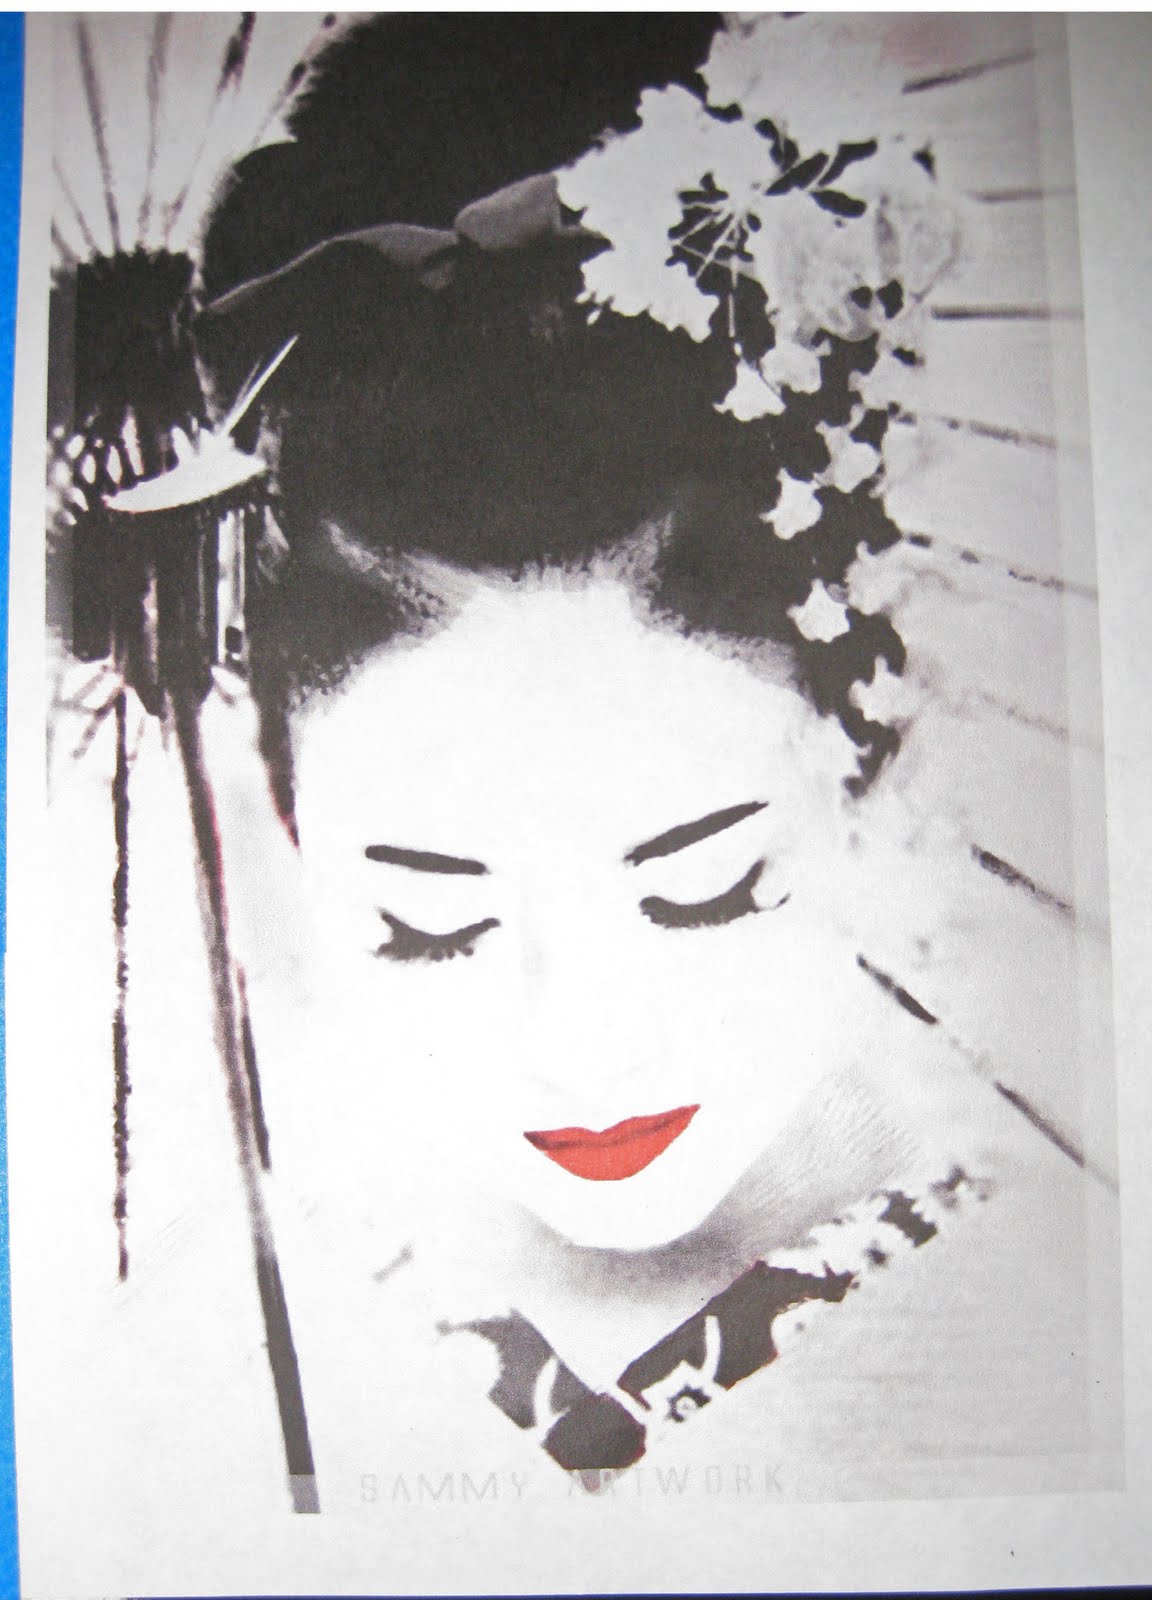
Here is the Geisha with the black color blocking completed.
Next, the striking white of the Geisha's face is filled in, followed by the bright red mouth that really sets the piece. White is also added to highlight the hair and the flower in her hair.  I am amazed at how little paint it takes to fill in an area.  Krystiano stressed using transparent color to build the finish.


Yellow and Violet highlights are added.  Very few colors were needed to create dimension.  Krystiano was going for a "vintage" feel to the piece.  It reminded me of a vintage travel poster.


Here Krystiano is working on the kimono using stencils and free-hand shading. The only hard line is the actual neck line of the garment yet the shading around the soft pattern gives the illusion that a kimono is present. 

The completed airbrush work!  I sealed the piece with Aquaguard Gloss and let it dry overnight. The next day I used Rich Brown Stain & Seal thinned with FX Thinner to create a tea-stain.  I brushed it 100% over the surface and softened with a dry terry towel.
The completed Geisha.  I know we need to have the piece in the studio to promote future airbrush classes but Bruce and I love it. We want to frame it and hang her in our home where it would go perfectly-we have an Asian Contemporary.  The best part is that Krystiano signed his work and when he is world famous, the Slatons will have an original.  Thanks so much our friend for a great class and a fun visist.  We will miss your Brazilian Grill and the good company!

Awesome Airbrush Class

The best part about owning a studio is all the cool artists you get to meet. Our talented friend Orlando Artist Krystiano spent over a week with us at Surfaces. After being a part of my week long cabinet class series, Krystiano taught a weekend long Introduction to Airbrush class-and I got to be a student.  I know Krys is a wonderful artist but he is also a wonderful teacher-very outgoing and funny.  I, and the other attendees, left feeling like this is something we could really do on our own.  I am ready to airbrush my lower level game room and will post the results. For now, please enjoy pictures from the class.

This is an exercise in gradation of single and multiple colors.

Kerry and Sydney working on a color shading exercise.  Both had excellent samples.

Sue gets a "thumbs-up" from Krystiano on her masking exercise.


Kerry working on an exercise.


Kerry's masking exercise and ideas for children's murals. Her work with the airbrush was very dimensional!

My masking exercise-a little raggedy next to Kerrys! I was thrilled since this was the first time I have ever worked with an airbrush.

A sample from the planet exercise.

My planets-anyone want a Star Wars Room?  I am ready!

The Cloud Critique.

My first clouds with an airbrush.  My skies always look a little stormy-wonder why?
My night sky.  I will never hand brush a sky again!
We ended the class by working on stencils and cabinetry.  I did this molding all with the airbrush over a base stain.  The thinned Stain & Seal worked great and I was able to shade, detail, water-mark, and fly flick without touching a single brush-crazy!
Krystiano thanks from all six of us. We had a great time and can't wait for your next class. Until then, we will all be airbrushing everything.

Monday, April 19, 2010

Simple Leather Skin Faux Finish

I am falling behind on my blog duties. Last week we spent preparing for a week of classes and our Artistic Plasters class at the end of the month. This week we had three different cabinet classes and this weekend we have Krystiano and his airbrush class! But I need to revisit the girls in the OC.
Lynne is our only brunette so she lets people know she is a true California Girl by her devotion to working out and tanning. Entrepreneurial inspiration struck while looking at her own parched arm one day and she thought, “I am going to make cuffs…big leather cuffs with lots of bedazzled crosses and fleur de lyses.” What better finish then one that looks like a big cuff unfurled on the wall?
(Photo: Bravo TV)

Step 1: Base paint the surface in Camel Setcoat or other dark Setcoat color.

Step 2: Mix 1/2 cup Camel Setcoat into 1 gallon of FE Venetian Gem Base Coat. Whip with a drill to evenly mix the two colors together. Trowel the plaster 100% over the surface working out from a corner. Delicate trowel lines are part of this finish. Some of the base color may shadow through. By the time you make it around the room, the first wall should be dry.


Step 3: Take the same tinted Venetian Gem Base Coat and tightly pull it over the first layer. The trowel lines of the first layer should show through this thin second coat.

Step 4A: Mix 1 Pint FE Aquacreme with ½ cup American Walnut Stain and Seal. Brush on the surface and soften with a damp cloth. (More glaze may be added to increase open time). Venetian Gem is absorbent-keep glaze edges soft and feathered out to avoid heavy lap lines.


Step 4B: Use a rubber trowel to pull the glaze into the Venetian Gem texture. Soften with your damp cloth. Continue operations A and B all around the room.

Step 5 (Optional) When the glaze is dry, use painters tape to mark off panels using a level. Tightly pull more of the tinted Venetian Base Coat plaster in the taped off areas.


Step 6: When the plaster is dry, glaze the panels with ½ cup Antique Cherry Stain mixed with 1 pint of Aquacreme. Pull the blue tape.


Step 7: (Optional) Normally we would use real tacks (Vahallan Papers is a great source).  But the budget is tight in the Curtain Home and a faux income calls for faux details. We added a center piece and “tacks” using stencils and Venetian Gem Plaster in Tiger’s Eye. When the designs were dry, we highlighted them with Bronze Stain.


We know that Lynne's family "moves" a lot.  Maybe it would be better to complete our leather on a canvas for fast removal as she works her way through luxury rentals along the Pacific Coast?